My Environment
Windows 7
Java 1.6
Step 1: The downloads
Download Struts 2.1.x : http://struts.apache.org/download.cgi
Download Eclipse(EE) 3.5.0 : http://www.eclipse.org/downloads/
Download Tomcat 6.0 : http://tomcat.apache.org/download-60.cgi
Download Plugin : http://www.eclipsetotale.com/tomcatPlugin.html#A3 (com.sysdeo.eclipse.tomcat_3.2.1) This needs to be unzipped to your Eclipse Plugins directory. Restart Eclipse, you may need a restart with -clean
Step 2: The easy part
Install Tomcat. The windows installer, auto installs. Just click next without changing too many

parameters if you are a novice.
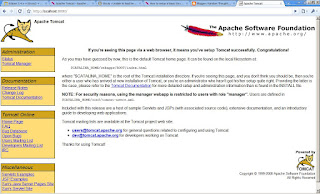
Once it is done, just hit http://localhost:8080/
The page on the right hand should ideally appear. It it does not, it means that the installation is not
proper.
(For ease of understandability I use C:\)
Unzip Eclipse in C:\
Unzip Struts in C:\
Unzip the plugin downloaded and place the plugin (com.sysdeo.eclipse.tomcat_3.2.1) in C:\eclipse\plugins\ folder.

Step 3 : The beginning…
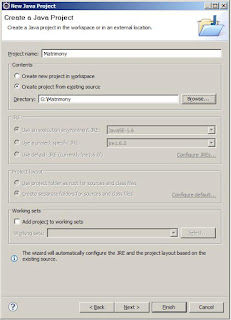
Start eclipse and create a New Project.
I named my Project as QBW.
Path : File –> New —> Dynamic Web Project.
Step 4: Jars that matter
Then copy paste the following 6 jars in the lib folder.
Path : WebContent –> WEB-INF –> lib
- commons-fileupload-1.2.1.jar
- commons-logging-1.0.4.jar
- freemarker-2.3.15.jar
- ognl-2.7.3.jar
- struts2-core-2.1.8.1.jar
- xwork-core-2.1.6.jar
Also add the Struts jar files in Java EE Module Dependencies (Properties of project).
No need for them in the "Java Build Path" Libraries as External Jar dependencies.
Step 5 (a): The XMLs
Replace the code in the web.xml with the following one.
Path : WebContent –> WEB-INF –> web.xml
<?xml version="1.0" encoding="UTF-8"?> <web-app
id="WebApp_9" version="2.4" xmlns="http://java.sun.com/xml/ns/j2ee"
xmlns:xsi="http://www.w3.org/2001/XMLSchema-instance"
xsi:schemaLocation="http://java.sun.com/xml/ns/j2ee

http://java.sun.com/xml/ns/j2ee/web-app_2_4.xsd">
<display-name>QBW : Welcomes You</display-name> <filter>
<filter-name>struts2</filter-name>
<filter-class>org.apache.struts2.dispatcher.FilterDispatcher</filter-class>
</filter> <filter-mapping>
<filter-name>struts2</filter-name>
<url-pattern>/*</url-pattern> </filter-mapping>
</web-app>
Step 5 (b) : The Struts.xml
Create a new xml, called struts.xml and copy the following code in it.
Path : src –> struts.xml
<?xml version="1.0" encoding="UTF-8" ?>
<!DOCTYPE struts PUBLIC "-//Apache Software Foundation//DTD Struts

Configuration 2.0//EN" "http://struts.apache.org/dtds/struts-2.0.dtd">
<struts> <constant name="struts.enable.DynamicMethodInvocation"
value="false" /> <constant name="struts.devMode" value="false" />
<package name="tutorial" namespace="/" extends="struts-default">
<action name="Welcome" class="QBW.Welcome">
<result>/Welcome.jsp</result> </action> </package>
</struts>
Step 6: The Java Class
Put in the following piece of code in Welcome.java of the QBW package.
Path : src –> QBW–> Welcome.java
package QBW;
import com.opensymphony.xwork2.ActionSupport;
public class Welcome extends ActionSupport {
private static final long serialVersionUID = 1L;
private String message;
public String execute()
{
setMessage("Hello, Welcome to QBW... ");
return SUCCESS;
}
public String getMessage() {
return message;
}
public void setMessage(String message) {
this.message = message;
}
}
Step 7: The JSP
This is the simplest part. Just create a JSP called Welcome.jsp
Path : WebContent –> Welcome.jsp
<%@ page contentType="text/html; charset=UTF-8" %>
<%@ taglib prefix="s" uri="/struts-tags" %> <html> <head>
<title>QBW</title> </head> <body> Message from
execute <br/><b><s:property value="message"/></b> The
message in bold was set using the execute method of struts. </body>
</html>
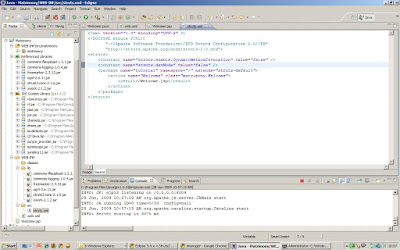
So now, your workspace will look approximately like this.

Step 8: Screenshots speak louder than words.
Just have a look at the screenshots in my next post. Uploading them in this same blog will be cumbersome…. It deals with running the application on Tomcat server.
The most helpful links I came across
Struts 2.1.x has some really weirdo Jar dependencies. So import as few a jars as possible.
In case you run into something with conversion and codebehind, have a look at the the link below.
If you see:
WARNING: [SetPropertiesRule]{Server/Service/Engine/Host/Context} Setting property 'source' to 'org.eclipse.jst.jee.server:QBW' did not find a matching property.
The solution to this problem is very simple. Double click on your tomcat server. It will open the server configuration. Under server options check ‘Publish module contents to separate XML files’ checkbox. Restart your server. This time your page will come without any issues.